Tuesday, 26 February 2019

DNS in CentOS 7


yum install bind bind-utils

Turn off firewall or allow dns service:


Setup RNDC:


Create master zone and Apply zone:


·  Email address: enter the address of the person responsible for this zone. You can use the .. (double dot) in the address, which Webmin will automatically convert to a dot for inclusion in the SOA record.
·  Refresh time: determines how often secondary servers should check with this master server for updates to the zone. The default is reasonable, but you may want to increase it for zones that rarely change, or decrease it for those that are frequently updated.
·  Transfer retry time: determines how long a secondary server should wait after a failed zone transfer before trying again.
·  Expiry time: controls the maximum amount of time that a secondary DNS server for the zone should cache records for before re-transferring them from the master.
·  Default time-to-live (Negative cache time): determines the TTL of records in the zone that do not have one set explicitly. An older common TTL value for DNS was 86400 seconds, which is 24 hours. A TTL value of 86400 would mean that, if a DNS record was changed on the authoritative nameserver, DNS servers around the world could still be showing the old value from their cache for up to 24 hours after the change.

Add Address Record and Apply zone:


vim /etc/named.conf:


Reference:
Primary nameserver: ns1.mmmmm.com.my
Hostmaster E-mail address: domains.mmmmm.com.my
Serial #: 2018040401
Refresh: 1200
Retry: 180
Expire: 14400   4 hours
Default TTL: 7200

Monday, 25 February 2019

CREATING A PASSWORD AUDITING VM FOR WINDOWS SYSTEMS


1.    Impacket Installation

The following steps can install the impacket framework on an Ubuntu machine.
11. After installation, ensure your Ubuntu VM can reach the Internet.
22. Create a folder you wish to work from.
33. sudo apt-get install git python-pip
44. sudo pip install ldap3==2.5.1
66. sudo python setup.py install
77. you should be able to run secretsdump.py from any folder now

2.    Hashcat Installation

· 2. 7zr x hashcat-5.1.0.7z
· 3. apt install ocl-icd-libopencl1 git build-essential -y
· 4. apt-get install libhwloc-dev ocl-icd-dev ocl-icd-opencl-dev
· 5. apt-get install pocl-opencl-icd
· 6. apt install ocl-icd-libopencl1 git build-essential

secretsdump.py -h

root@root-virtual-machine:~$ secretsdump.py mydomain/Administrator@192.168.0.101 -outputfile demo -user-status -pwd-last-set

How to setup network after RHEL/CentOS 7 minimal installation

After installing RHEL/CentOS 7 minimal, You may not able to connect network in that machine. This will happen because Ethernet interfaces are not enabled by default.
This guide explain you to setup network on RHEL/CentOS 7.

Setup network on CentOS 7 minimal

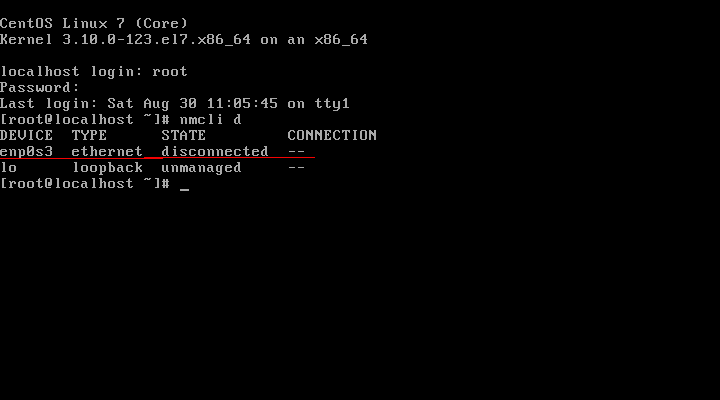
First, type “nmcli d” command in your terminal for quick list ethernet card installed on your machine:
"nmcli d" command output
“nmcli d” command output
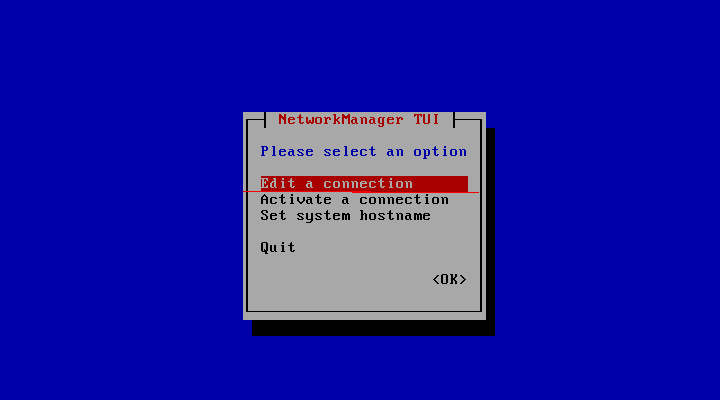
Type “nmtui” command in your terminal to open Network manager. After opening Network manager chose “Edit connection” and press Enter (Use TAB button for choosing options).
CentOS_7 Network manager screen
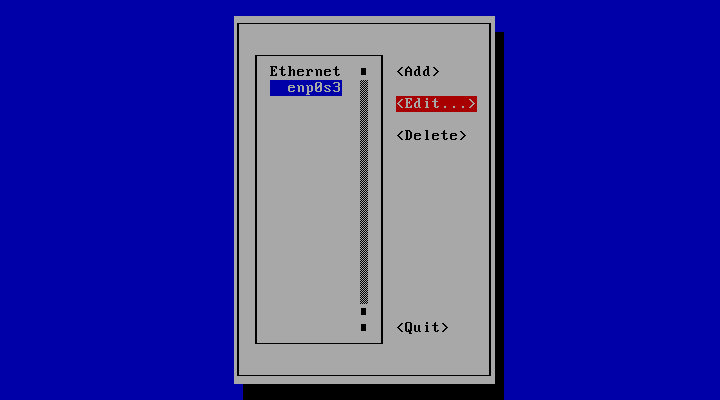
Now choose you network interfaces and click “Edit
Edit your network interfaces

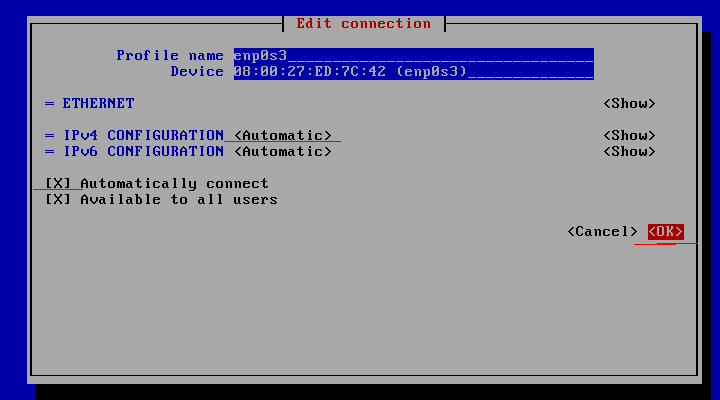
DHCP configuration

Choose “Automatic” in IPv4 CONFIGURATION and check Automatically connect check box and press OK and quit from Network manager.
Set ip adress using DHCP
Reset network services:
service network restart
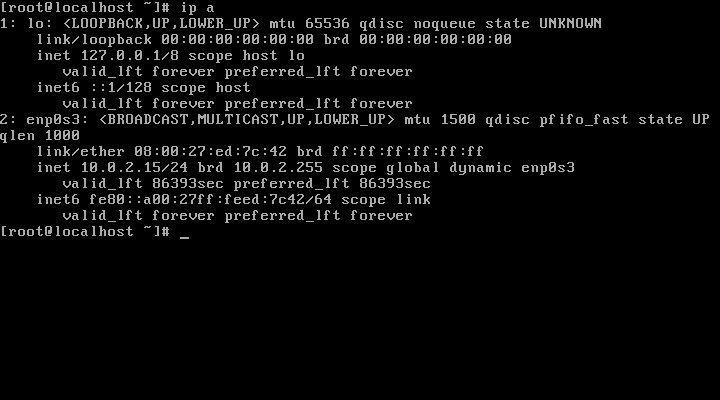
Now your server will get IP Address from DHCP .
CentOS 7 check ip address
 
 
In this small tutorial i will explain how to configure static ip address on CentOS 7 minimal.
First, need to edit the set up for the ethernet. Let’s start with editing “/etc/sysconfig/network-scripts/ifcfg-enp0s3″ file:
vi /etc/sysconfig/network-scripts/ifcfg-enp0s3
HWADDR=08:00:27:6C:FF:91
TYPE=Ethernet
BOOTPROTO=static
DEFROUTE=yes
PEERDNS=yes
PEERROUTES=yes
IPV4_FAILURE_FATAL=no
IPADDR=192.168.0.88
IPV6INIT=yes
IPV6_AUTOCONF=yes
IPV6_DEFROUTE=yes
IPV6_PEERDNS=yes
IPV6_PEERROUTES=yes
IPV6_FAILURE_FATAL=no
NAME=enp0s3
UUID=ea68db6e-461e-427d-b9a8-bfcf6e1a4fc6
ONBOOT=yes
Save and exit.